
Configuring SSO with Auth0
Configuring SSO requires configuring both Tarsal and Auth0 in parallel.
Tarsal Walkthrough
To start, login to your Tarsal account as an administrator.
-
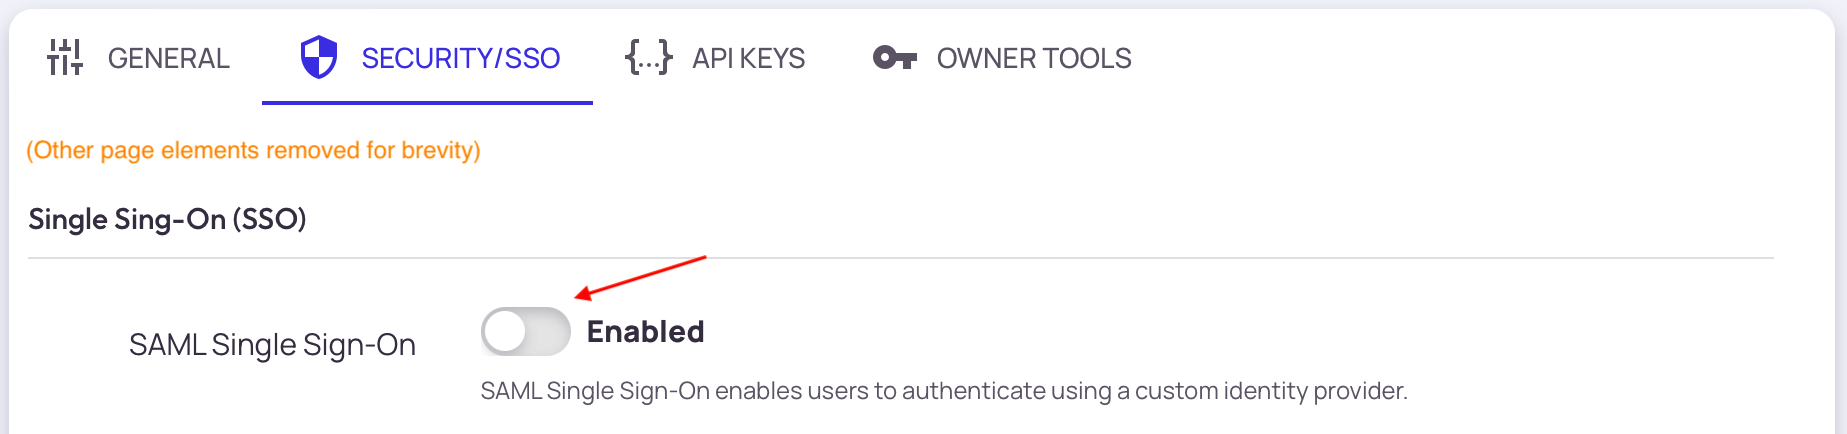
Navigate to Settings > Security/SSO and enable "SAML Single Sign-On"
-
After enabling SSO, you will see a page with custom assertion values that you will need to input into Auth0. These include:
- Entity ID
- Assertion Consumer Service (ACS)
- Tarsal's Public Certificate
Auth0 Walkthrough
-
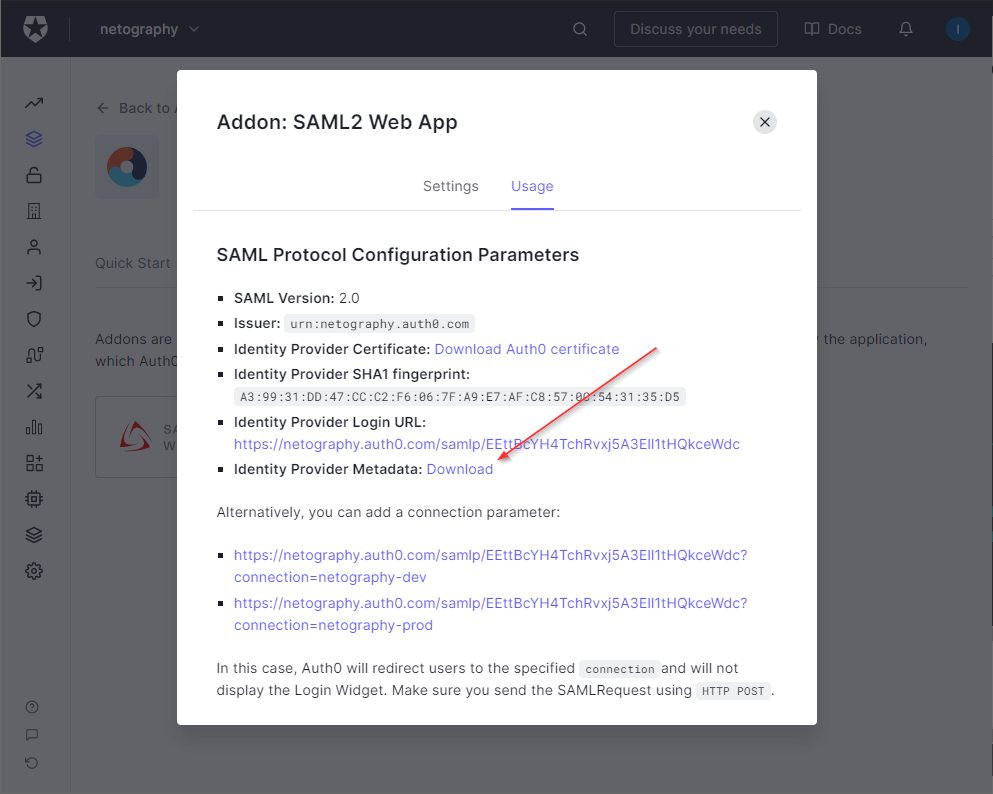
Configure Auth0 as a SAML Identify Provider
- Use the Assertion Consumer Service (ACS) url provided by tarsal as the value for the Application Callback URL.
-
Update SAML Mappings
- Required mappings are
- First Name
- Last Name
- Role
- Paste the following code into Settings, and update the ACS URL as above.
    {
      "logout": {
        "callback": <Assertion consumer service URL>
      },
      "mappings": {
        "email": "email",
        "nickname": "nickname",
        "phone_number": "phone_number",
        "picture": "picture",
        "role": "role"
      },
      "createUpnClaim": false,
      "passthroughClaimsWithNoMapping": false,
      "mapUnknownClaimsAsIs": false,
      "mapIdentities": false
    }
- Required mappings are
-
After the app has been enabled, Download the Identity Provider Metadata file. This file will need to be uploaded to Tarsal as part of the Post-Configuration steps.
-
Map user attributes. Tarsal allows SAML mappings for the following fields:
- Email (required)
- First Name (required)
- Last Name (required)
- Picture URL
Tarsal Post Configuration
-
Upload the Identity Provider metadata file as part of Step 2
-
Configure the User attribute mappers. These should match the key names of the mappers configured above.
-
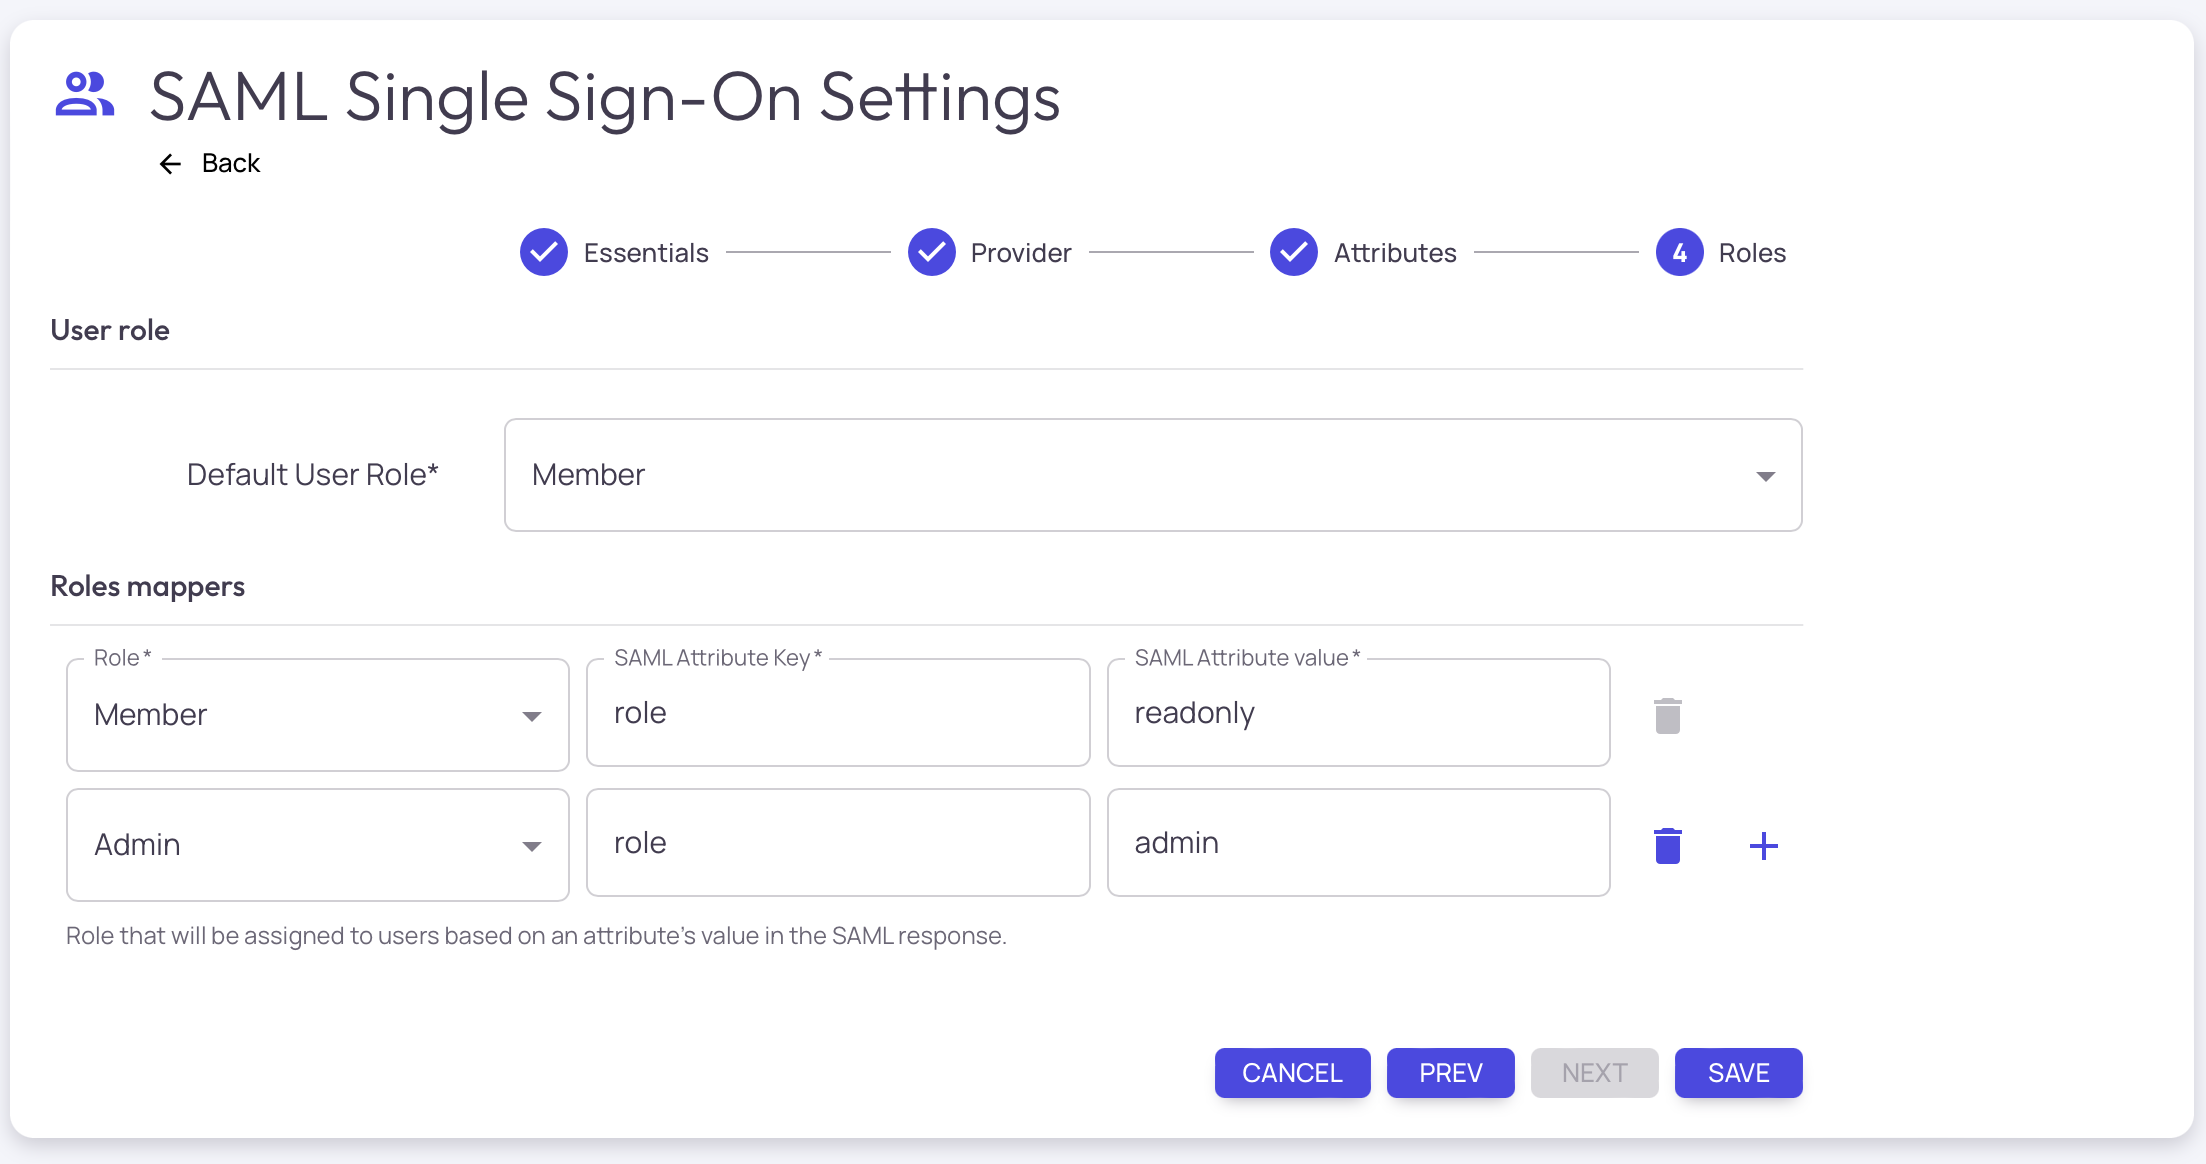
Configure the Default User Role. This is the role all users will assume if no role mappings are found in the SAML exchange
It is recommended to set the Default User Role to 'admin' during configuration.Once the configuration has been validated, then it is recommended to set the Default User Role to 'member'
-
Configure Admin Role Mappers. This is where you can map the value of the role assertion to a specific role in Tarsal. For example, the Tarsal role is 'member' but the SAML Attribute Value may be 'readonly'.
-
When finished, you can now direct users to login via your customer Login URL. This can be found on the first "Essentials" step on the Single Sign-On settings page.
Updated about 1 year ago